
I completed an instructional guide through iFixit EDU as part of my coursework for Dr. Erin Friess’ class on the principles of technical communication. We created individual Fast Fix guides instructing users how to repair household items by partnering with iFixit EDU. I created a guide with written and visual content that demonstrates how to pick up a dropped stitch in a knitted garment. My submission was recognized as an exceptional submission and tagged by iFixit as a Featured Student Guide.
Background
iFixit is a self-described “free repair manual that you can edit” (iFixit). Put simply, iFixit is an online repair community that provides thousands of repair articles that users can contribute to. iFixit EDU is a project that supports university students by walking them through creating informative guides to repair household items.
Process
The Fast Fix project includes three steps: submitting a proposal, taking quality photos (Checkpoint 1), and writing thorough steps (Checkpoint 2). We worked directly with the iFixit technical writing team by sharing our progress at each stage and receiving feedback before proceeding.
Checkpoint 1: Proposal
I began by writing a proposal for my topic to the iFixit team. The proposal required me to outline my plan and justify why my topic would be a valuable contribution to the iFixit community. Please see my proposal below:
Checkpoint 2: Photography
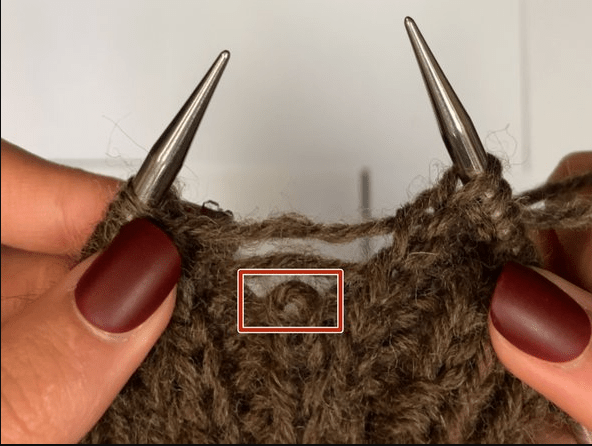
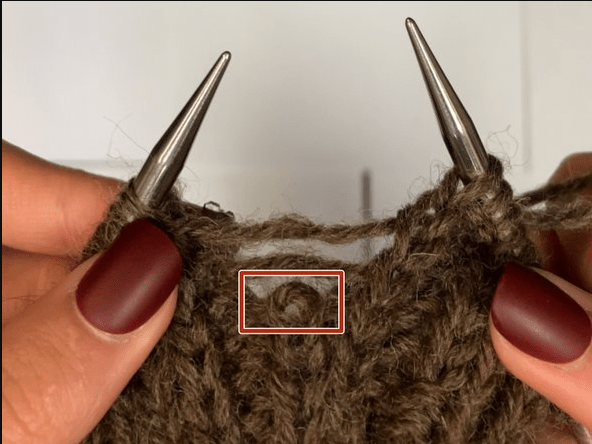
Next, I planned the types of photos I wanted to include in my guide. Since my guide covers knitting, I wanted close-up shots of my hands with a knitted garment. I shot a 4K 60fps video of myself picking up and fixing a dropped stitch, then captured screenshots.
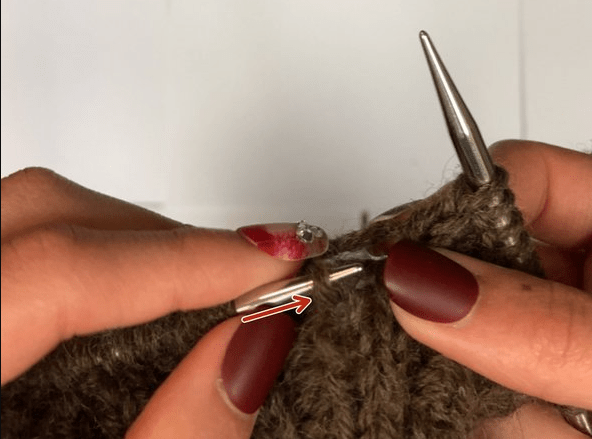
When recording the video, I walked slowly through the process of picking up the dropped stitch. This allowed me to capture high-quality images with no blur. Additionally, grabbing screenshots of the process in action helped me refine my steps when it was time to write. Once I collected enough screenshots, I marked them up with arrows and boxes as needed for clarity. See below for examples of the marked up screenshots.
Finished Instruction Guide
Lastly, I wrote steps to accompany the images. iFixit specifies that the steps should adhere to the following parameters:
- Is easy to understand and follow for an audience with an average to below-average technical background
- Is free of verbose and muddled directions
- Avoids vague language and outlines the procedure with adequate detail in each of the guide steps
- Correctly identifies key tools and components used in the procedure
- Is free of major errors in grammar, punctuation, and spelling
- Includes a descriptive introduction outlining the procedure being performed
Additionally, I began each step with a clear action verb and limited each step to one sentence for clarity. When needed, I included additional information beneath a step.
Result
Please see my finished guide below, which can be viewed online or as a downloadable PDF. One of my favorite parts about the project was receiving personalized feedback from the iFixit team. As an early-career master’s student, I am eager for opportunities to try new things and receive feedback so I can continue to hone my communication skills.
Through completing this project, I practiced the art of simplicity. As a communication student, I’m often tempted to overexplain. This assignment required me to stretch myself by adopting a “less is more” mentality that I was initially not comfortable with. However, I quickly fell in love with the principle of minimalism, and this project inspired me heavily when I began searching for full-time positions.
